How to Dual Boot Linux and Windows 7 - Shrink a Linux Partition to Install Windows 7
Obtain a Windows 7 Version
First, you’ll needa copy of Windows 7. A previous version of this article talked about downloading a beta or release candidate version and using it. However, now that we’re past the release date, we’ll assume that you have a real copy of Windows 7 that you want to install on your Linux box.
Creating a Windows Partition
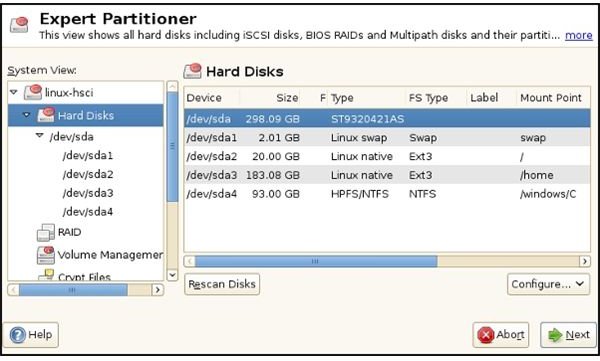
Once you have the installation DVD, the next step is to create room for Windows 7. We tested this on a notebook running openSuse Linux 11.1 and used the included “Expert Partitioner” application to shrink an existing partition. This could also be done using a Linux rescue disk or a GParted Live CD, which should work with any distribution using a common Linux file system.
In openSuse, click Menu → More Applications → Utilities → Yast. Enter your super-user password, and then open Partitioner.
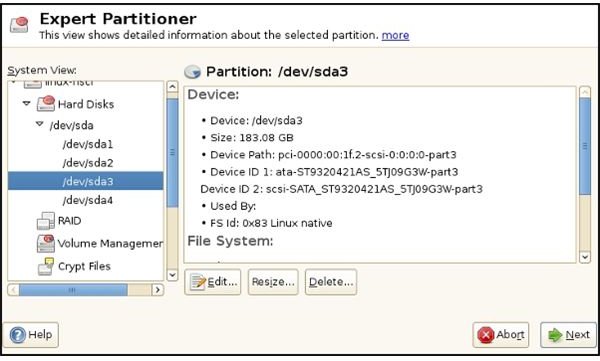
In Expert Partitioner, click on /dev/sda in the left-hand pane and the Partitions tab in the right-hand panel. The image below shows the partitions after the shrinking. The space for the 93 GB partition for Windows 7 was taken from /sda3.
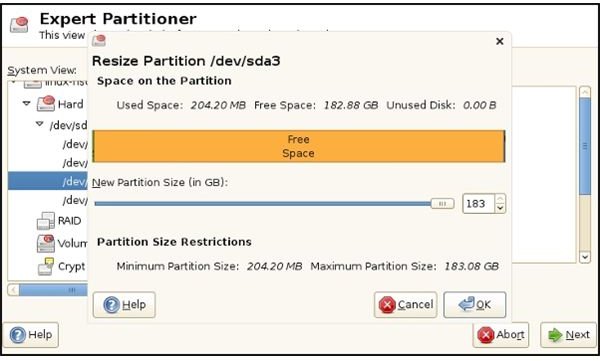
The steps involved are clicking the partition you want to resize and then clicking the “Resize” button at the bottom. This brings up the “Resize Partition” dialog. Dragging the pointer sideways adjusts the existing partition’s size. The new, unallocated space will show up as “Unused Disk” in the legend above the slider. Then just click OK to shrink the partition.
Shrinking a Partition with GParted Live CD
GParted can be downloaded at the SourceForge website.
You’ll need to follow the same process that you used to create the Windows 7 installation disk on your PC to create the GParted Live CD.
At startup, the installer asks for the keyboard configuration and preferred language followed by the desired video mode. This then left me looking at a Debian/Gnome home screen with GParted open.
Mebibytes and Gibibytes
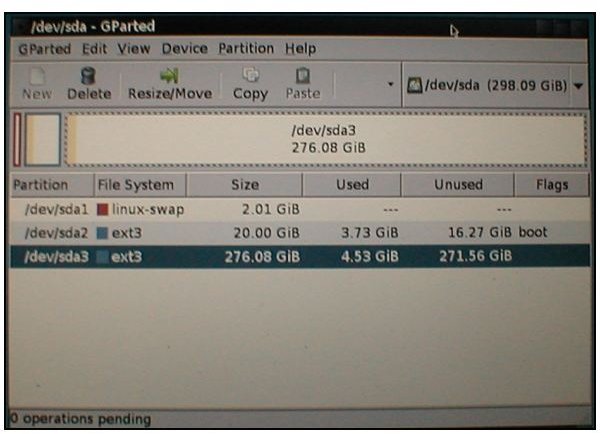
You may soon find yourself wondering what “MiB” and “GiB” are. You may wonder this as soon as you select the partition that you want to resize. GParted shows the sizes in Gibibytes and Mebibytes.
What are MiB and GiB? Besides a subject of technical discussion, they are hard drive size measurements that can be directly compared to RAM size measurements. 1024 (and not 1000) Mebibytes equals 1 Gibibyte. Even better, GParted expects us to know this and compute the changes ourselves. So let’s give it a try.
Our /dev/sda3 partition, according to openSuse and Expert Partitioner is 276.08 GB. We want to shrink it 100 GB for the new Windows 7 partition. GParted says that the partition is 271.56 GiB.
GB and MB come from an industry practice by hard drive manufacturers where they label capacity in MB = 1000 bytes and 1000 MB = 1 GB. This sounds much more attractive, they think, to purchasers who get their new drives installed and then discover that that the OS reports that it only has about 93% of the capacity they thought they were buying.
Mebibytes and gibibytes would solve this problem – if the hand-drive manufacturers would adopt the standard. 1024 MiB of hard drive capacity = 1 GiB in the same way that 1024 MB of RAM = 1 GB.
Anyway, we want Windows 7 to have 100 GB. 100 GB = 93 GiB, and 93 GiB = 95,232 MiB. That’s how much we want to shrink the drive in GParted.
Doing this same task in Windows Vista a few days ago, I used the “Shrink Tool” in Vista to shrink the partition, format it, and mark it “active.” For our purposes here, we’ll use Gparted to shrink the partition and see how it goes.
Next: Shrinking the Drive, Installing Windows 7, and Fixing GRUB to Dual-Boot
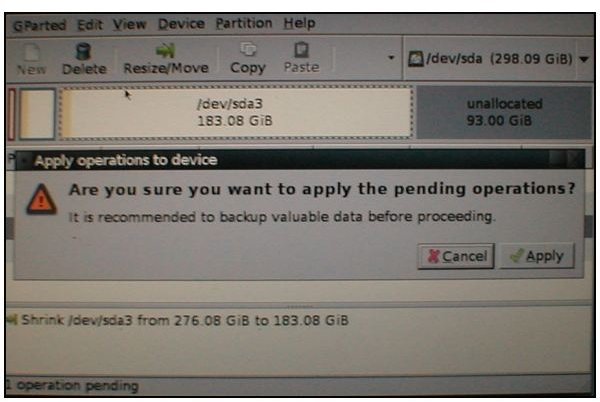
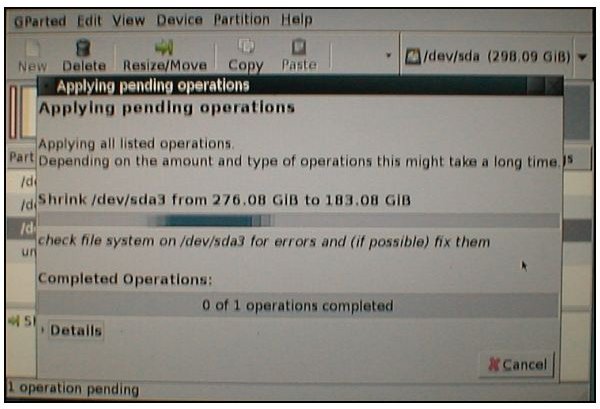
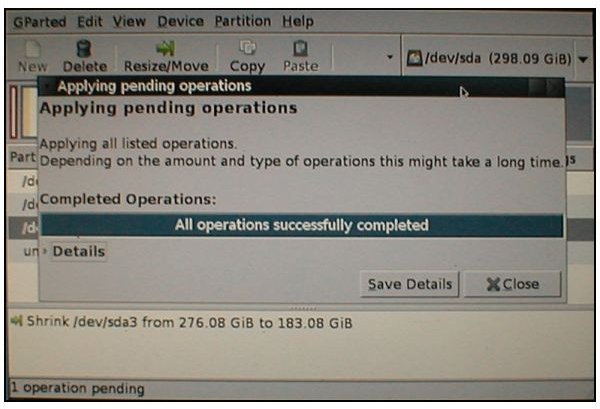
To actually perform the shrinking, click the partition and then click “Resize/Move” in the upper panel. Insert 95,232 (or your desired size, of course) in the “after” entry field and click OK. This will cause a message about the pending shrinkage to appear in the lower panel. To start the shrinking, click on Edit → Apply All Operations.
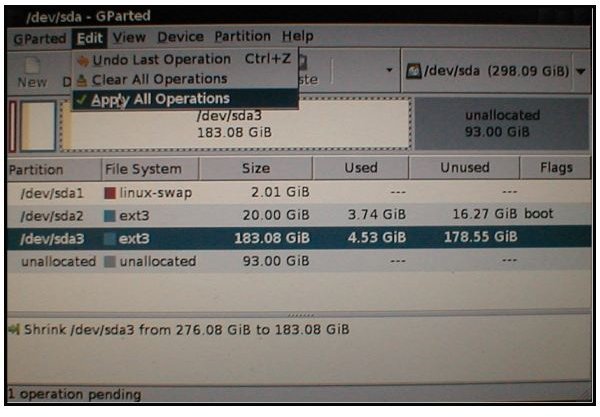
GParted displays a progress indicator while it runs, which took about twenty-two minutes.
At this point, you may want to right-click the new, unallocated space and set it to a “Primary” partition. You can also elect to format the partition to NTFS right from GParted. That’s purely your option, as the Windows 7 installer can do it, too. We tried it both ways, and the results were the same.
To exit the GParted Live CD, click the Exit icon at top right and wait for the shutdown to be broadcast. After several seconds, it will ask you to remove the CD, close the tray “if any,” and press Enter.
Installing Windows 7
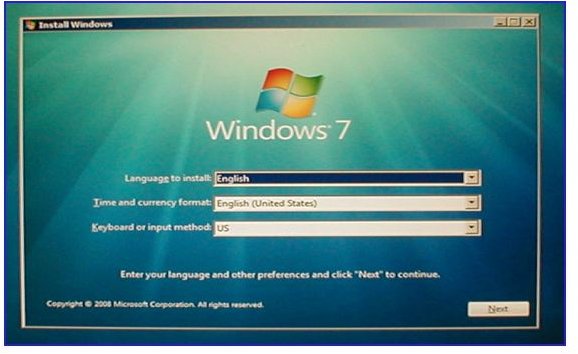
After rebooting from the Windows 7 DVD, the installation will begin. It will first ask for language, currency and time, and keyboard layout.
Windows 7 installed will take up about 17 to 20 GB on your new partition.
If you elected to not to partition the unallocated space, the Windows installer will automatically highlight it. However, clicking “Next” at this point will create an error message. Instead, click “New” and you’ll be able to create the new partition and format it, or rather, set it up to be partitioned and formatted. The actual formatting takes place when the main install progress screen is showing.
Windows 7 will restart once during installation. Watch for this notification because this is when you’ll be removing the DVD. This restart will automatically go back to the Windows installer. Of course, this means that Windows has added itself to the master boot record. Don’t worry, though. Unlike Windows XP, Vista and Windows 7 don’t wipe out the GRUB configuration. It’s still there, even thought Windows will mark itself as the primary OS.
Here are a couple of other notes about installing. If you have an Internet connection during setup, Windows 7 will ask you which group - home, work, or public - to add the connection to. If you select “Home Group” and it detects a Wi-fi radio, it will give you a group password. This automates setting up home networks somewhat, but it only works with other Windows 7 PCs.
Also, soon after starting Windows for the first time, it will warn you about needing antivirus software. (This is Windows, after all.) Clicking the link in the dialog will take you to the Windows 7 Security page. Scroll down and you’ll find links to antivirus trials by Kaspersky, McAfee, and AVG.
I like this part, so here’s an image from the earlier version of this article. It was what the Windows 7 release candidate looked like after setup.
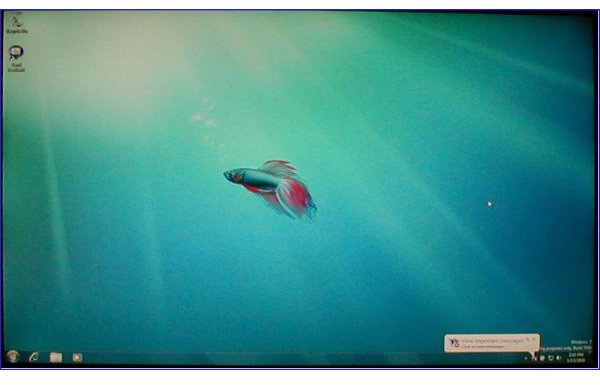
And, yes, that background was a pun. That’s a Siamese Fighting Fish, which is also known as a beta fish. (Some users have reported that they see a different background when they install Windows 7 RC. I did not. Alas, this image is not among those in the released version of Windows 7.)
Getting GRUB Back
There are several ways that you can get the GRUB menu back. Probably the easiest method is to boot the PC from your Linux distribution’s installation DVD. Then select “Repair” to find the tools to correct the boot loader or to create a new bootloader. Both methods will find and include the Windows installation. (openSUSE marks it as “windows/c.”)
You could also use the distro disk to start Linux from the hard drive. Then the commands
sudo grub
root (hd0,0)
setup (hd0)
in a terminal should repair GRUB and display the Windows option as well.
And if you’re looking for something educational that you can later brag about, try using the SuperGRUBDisk to restore your MBR.
Finishing Up
And there you have it - how to dual boot Linux and Windows 7. As a long time Linux enthusiast (and before that an OS/2 user), I’m optimistic that this time Microsoft is getting it right for the mass of Windows users. It won’t satisfy every user, just as no one Linux distribution does. If it makes things easier for the casual, non-expert user, that’s all good.
Thank you for reading this, and thank you for visiting Bright Hub. I hope this article helped you install Windows 7 on your Linux box.