See how to draw to and animate the canvas element using JavaScript, with step by step example code and live demo application.
Getting Started
Now that we know what the canvas element is , it’s time to actually draw something onto the screen. First we need a HTML page to hold and display the canvas element.
The HTML is very straightforward. There are two important elements here.
This line includes the JavaScript source code that will actually modify the canvas element, which will be described later.
Your browser does not support the canvas element.
Here we have created the canvas element. Those browsers that don’t support the canvas element, like Internet Explorer (up to version 8), ignore it, displaying the child elements instead. In our case there is a simple paragraph warning the user that their browser doesn’t support the canvas element. Those browsers that do support the canvas element, like Chrome , Opera and Firefox ignore any children of the canvas element.
The ID attribute of the canvas element is important, as we will need to get a reference to this element using it via JavaScript later on. The width and height attributes simply specify the size of the canvas element, just like any other HTML element like a table or an image.
The canvas element is quite useless on it’s own. JavaScript has to be used to draw anything onto the canvas, and in our case the JavaScript code that will do the drawing is held in the jsplatformer1.js file. As a simple introduction we will load an image, draw it onto the canvas, and move it around.
First up some global variables need to be defined.
const FPS = 30;
The FPS variable defines the frequency that the canvas will be redrawn.
var x = 0;
var y = 0;
var xDirection = 1;
var yDirection = 1;
The x, y, xDirection and yDirection variables are used to defined the position of the image (relative to the top left corner of the canvas) and the direction that it is currently moving.
var image = new Image();
image.src = “https://javascript-tutorials.googlecode.com/files/jsplatformer1-smiley.jpg ”;
In order to draw an image onto the canvas we need to load up an image. For this we create an Image object, and set the src property to the location an image file.
var canvas = null;
var context2D = null;
We also need a reference to the canvas element itself, as well as it’s drawing context (more on the context later). We will assign the correct values to these later, so for now they are set to null.
window.onload = init;
Finally we need to be notified when the page has been loaded in order to run the code that will draw to the canvas, so we set the init function to be called on the windows onload event.
Continue on to the next page for the rest of the tutorial.
The Init Function
function init()
{
canvas = document.getElementById(‘canvas’);
context2D = canvas.getContext(‘2d’);
setInterval(draw, 1000 / FPS);
}
Once the page has been loaded the init function is called. Here we can get a reference to the canvas element, referencing it by the ID attribute defined in the HTML file (unimaginatively called canvas here). We also need a reference to the 2D context of the canvas.
The context defines how the canvas is drawn to. As the name suggests, the 2D context allows 2D shapes, images and text to be drawn to the canvas. All browsers that support the canvas element support the 2D context, but there are other experimental contexts available. Opera has a 2D context designed specifically with games in mind, and Mozilla has a 3D context for displaying 3D scenes . Unfortunately these additional contexts are only supported on specific browsers at the moment, so if you want to create a web application that uses the canvas element it’s best to stick to the vanilla 2D context.
Because we are drawing an animated image, we need to set up what is called a render loop. A render loop is just a function that is called repeatedly, allowing (in this case) the position of the image to be moved slightly across the screen during each iteration of the render loop, giving the impression of movement. For this we call the setInterval function. The first parameter is the function that should be called, which we have named draw. The second is the frequency that the function is called at. This value is measured in milliseconds, so we divide 1000 by the FPS value defined earlier to calculate how many milliseconds should be between each call.
Note that just because we have specified that the draw function should be called 30 times a seconds, in reality this may not happen. How frequently the draw function is called depends on the speed of the underlying JavaScript engine and the complexity of the code being executed in the draw function. On slow systems the draw function might only be called once per second. The frequency value supplied to the setInterval function can only be considered a best case.
Read on to the next page for the conclusion of this JavaScript tutorial.
The Draw Function
It’s in the draw function that we actually draw onto the canvas. Lets break this code done to see what is going on.
context2D.clearRect(0, 0, canvas.width, canvas.height);
All drawing is done to the context rather than the canvas element itself. First we clear the context, which gives us a clean slate to work with each frame.
context2D.drawImage(image, x, y);
Next we draw the image to the context using our x and y variables to specify the position to draw the image at.
x += 1 * xDirection;
y += 1 * yDirection;
In order to move the image across the canvas the x and y positions are either incremented or decremented depending on whether xDirection and yDirection are equal to 1 (moving right or down) or -1 (moving up or left).
if (x >= 450)
{
x = 450;
xDirection = -1;
}
else if (x <= 0)
{
x = 0;
xDirection = 1;
}
if (y >= 250)
{
y = 250;
yDirection = -1;
}
else if (y <= 0)
{
y = 0;
yDirection = 1;
}
If the image has moved off the side of the canvas the direction of the image is reversed. We know the dimensions of the image are 150 x 150 pixels, and the dimensions of the canvas are set to 600 x 400 pixels, which gives us the values of 450 (600 - 150) and 250 (400 - 150).
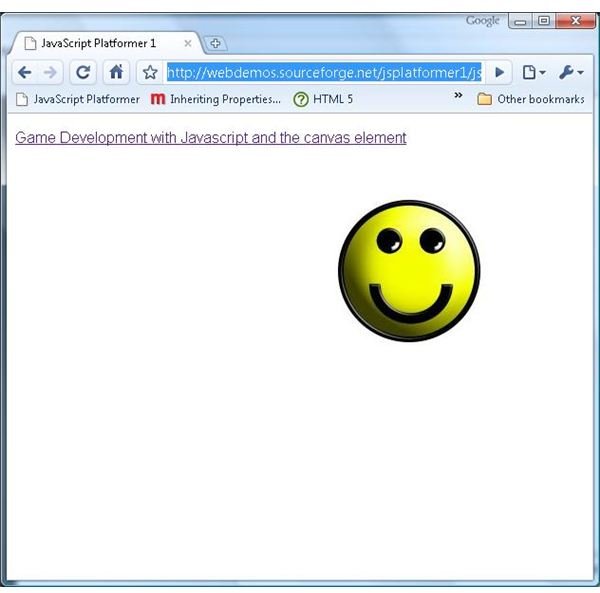
The end result is a smiley face that bounces around inside the canvas. You may be thinking at this point that the same effect could be achieved more easily by modifying the position of an DIV element, and you would be right. However this is just a taste of what can be achieved with the canvas element. The next article will show you some of the advanced effects that can be applied using the canvas element that would be difficult to achieve any other way.
Check out the demo here , and download the source code here .
Read more in the Game Development with JavaScript and the Canvas element series.
Images
This post is part of the series: Game Development with Javascript and the canvas element
This series will show you how to create a simple platform game with JavaScript and the new canvas element. With step by step examples, source code and live online demos you can see the power that the canvas element gives to web developers.


