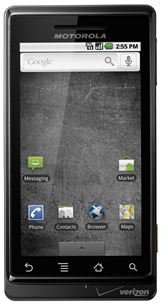
How to Jailbreak a Motorola Droid (Milestone) with Root
Introduction to Rooting/Jailbreaking a Motorola Droid
In the Apple world, there’s jailbreaking, but in Android, there’s rooting. In essence, they both do the same thing: unlock your phone by giving you administrator “root” access to access the phone’s hardware and software. We’ve covered why you should root your phone and rooting your Android phone in the past, but this guide is dedicated 100% to rooting your Motorola Droid (if you have Verizon Wireless in the US) or Milestone (elsewhere).
Unlike the other Droid 2, X, and Incredible variations of the Droid name, the original Droid 1 has been out for some time and it has been fully rooted and the hacking community has a firm grasp over the hardware and software. What this means for you is it should be a straightforward rooting process as it has been done many times before. Of course, the usual caveats to rooting apply; it temporarily voids the warranty and has the small potential of bricking your phone (which can be fixed).
It should also be mentioned that this method would probably work on a similar phone like the Droid 2 or X, but that for a more general solution, see our Android rooting guide.
Rooting a Motorola Droid with Froyo 2.2 (FRG22D)
The 2.2 Froyo update is the most recent version of Android. Chances are if your phone is updated regularly, this is what you’re running. The Froyo update for the Droid has two variations in the firmware. The first is FRG01B and the second is FRG22D, which had a few bug fixes and enabled Adobe Flash Player 10.1 for Android to be downloaded in the Market. To figure out which build you are running, read about finding which version of Android you are running. In the About screen, it should be clearly listed under build number.
FRG22D Rooting Instructions with SuperOneClick:
To root the latest version of the Droid, we will use a nifty program called SuperOneClick! It’s as simple as the name sounds, a one-click solution for rooting a variety of new Android phones. It is supported on Windows, Ubuntu, and Debian.
- Once downloaded and installed, simply open up the program
- Connect your phone via USB to your computer and enable USB Debugging mode. Do not mount your SD card! (SuperOneClick won’t work if you do).
- Click Root to root your phone! Once OK is displayed on the program and you have the Superuser app on your phone, you know the process is complete!
The Unroot option will obviously 1 click unroot it so that your is Droid locked again with the full warranty!
To enable USB debugging mode go into Settings > Applications > Development > USB Debugging (check to enable).
If you are having difficulty with the app hanging on mounting or waiting for the device, try power cycling the phone a few times and disabling and re-enabling USB debugging mode. Alternatively, you can boot into recovery mode and root from there. One of these methods should do the trick.
Rooting a Motorola Droid with Froyo 2.2 (FRG01B), Eclair 2.1 or 2.01
Fortunately, all three of these versions can all be rooted using the same 1-click method documented in our all-inclusive Android rooting guide via UniversalAndroot.
Universal Androot is unfortunately no longer being updated, but it still works for the previous versions of the Droid. It works in the same way as SuperOneClick except that you can root your phone untethered (without a computer). All you need to do is install the APK and run it from there!
What To Do After Root?
That’s all you need to do to jailbreak your Motorola Droid. Congratulations on gaining root access! Your phone is now free from your carrier, Google, and Motorola. You now have the ability to install some of the best rooted apps, wirelessly tether over Wi-Fi, and install a custom ROM for even more fun!
